If you’ve recently purchased a piece of fine art photography from a renowned photographer like Peter Lik, you may be wondering how to best display and light it in your home. After all, you want to make sure your investment gets the attention it deserves.
Here, we'll explore the best tips for illuminating these fine art photography masterpieces on your own walls. By understanding the principles of lighting fine art photography, you can enhance these prints and create a lasting impression.
How Do You Light Photography on Your Wall?
To effectively light photography on the wall, follow these essential tips:
- Choose adjustable lighting fixtures such as track lights or wall sconces that can be directed toward the artwork.
- Aim for a light bulb color temperature of around 3000K to create a warm and inviting glow.
- Avoid direct light and glare by positioning fixtures strategically - usually at a 10-25 degree throw or beam spread.
- Achieve a balanced lighting situation by distributing the light evenly across the photo. This can be done by using diffusers or moving the lights further away.
- Use dimmers or adjustable controls to fine-tune the intensity of the light and create more ambiance.
What's the Best Lighting for a Gallery Wall?
Gallery walls are a great way to display a variety of fine art photos with the right lighting. Here are some lighting suggestions to help you achieve a pleasing look:
- Track lighting: One of the most popular lighting options for a gallery wall is track lighting. This allows you to adjust and direct the light onto each piece of artwork. Choose track lights with adjustable heads to highlight specific areas.
- Picture lights: Picture lights are another excellent choice. These fixtures can be mounted above the artwork and provide a focused beam of light, drawing attention to an individual piece.
- Wall sconces: Wall sconces offer stylish and elegant lighting for a gallery wall. They can be mounted directly on the wall, providing soft, indirect lighting that washes over the artwork.
- Natural light: If your gallery wall is located near a window or receives natural light during the day, consider how the sunlight will interact with your artwork. Direct sunlight can cause fading or damage to delicate pieces, so it's important to use UV-filtering window treatments or position the artwork away from direct sunlight. Also, remember that natural light changes throughout the day, so adjust your artificial lighting accordingly.
How High Should a Picture Light Be Above a Photo on the Wall?
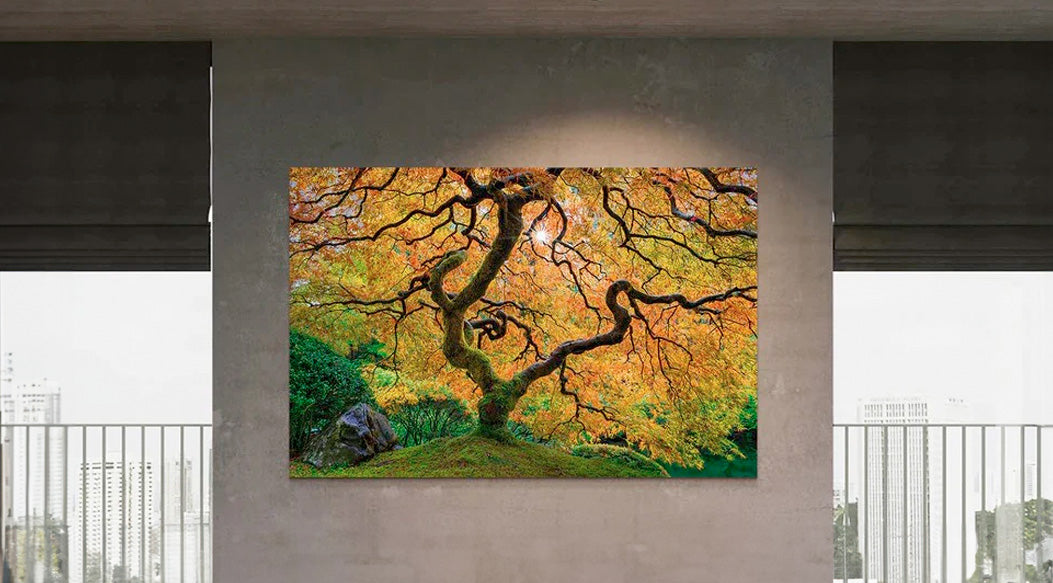
When it comes to lighting a hanging photograph, the positioning of the light plays a big role in the desired effect. The optimal distance for the art light is about one-third to halfway down from the top of the photo.
Secondly, consider the viewing angle when determining the height of the picture light. Ideally, it should light the photograph at eye level when viewed from a typical viewing distance.
// View Peter Lik's award-winning fine art photography
The light should also be proportional to the artwork. In other words, take the size of the framed photo into account when deciding on the height of the picture light.
Larger artworks may require the light to be placed slightly higher to cover the entire piece, while smaller photographs might benefit from a lower placement.
Keep in mind that lighting preferences can vary, and it's essential to find the height that best suits your specific artwork and space. Don't hesitate to experiment and make adjustments to the picture light's height to achieve the effect you’re going for.
Take a step back and observe how the light interacts with the photograph from different angles and choose what is pleasing to you.
What is the Best Light to Shine on Framed Photos?

When it comes to lighting framed photography, the right light source will enhance the visual impact and preserve the integrity of the artwork.
Peter Lik’s Research and Development team has determined that LED lights are unable to match the light quality that Halogen bulbs provide, especially when it comes to dimming the lights and creating glow.
It is recommended to use a halogen spotlight, like a Halco 50 watt halogen MR16 bulb, with a 10-25 degree throw or beam spread.
Spotlights typically have a 10 degree throw while flood lights are generally over 20 degrees. If you want to flood an area with light, it is recommended to use higher wattage and avoid a large beam spread if the lights are placed over 8-10 feet away from the image.
When it comes to dimming the lights, you can replicate the lighting setup used in Peter Lik’s galleries by dimming your halogen lights by approximately 10%, which casts a warm yellowish glow on the photograph.
Bring Your Art to Life
When lighting fine art photos on your wall, consider your lighting choices wisely. By selecting the best light to showcase your framed photos, you can truly bring the art to life, highlighting the stunning beauty of each piece.